How to Make a Winter Window Box with Arches
Inspired by Red Barn White House®
Spoiler alert: I’m too excited to wait until the end of this post to share my news with you! I have a special discount code for you to save 10% when you shop the Red Barn White House Etsy store HERE! Just type STEPHSAVES10 when you check out.
Okay, now that I’ve gotten that off my chest, here’s WHY I want you to shop for ornamental arches and orbs at Red Barn White House:
Each January, as I take down the Christmas decorations, I think about what to repeat next year and what to do differently. I don’t go overboard with holiday decor, but I like to do a few things really well — including my window boxes.
I was recently introduced to Red Barn White House, a Minnesota-based producer of handmade orbs and arches for the garden. The ornaments are designed primarily for use in container gardens as they add structure and definition to arrangements. I’ve been thinking about doing something different with my kitchen window box, so I ordered a set of 3 to create a glowing holiday arrangement. It was pretty simple and turned out beautifully; you might want to give it a try. Here’s how I did it.
Step 1: assemble and insert the arches
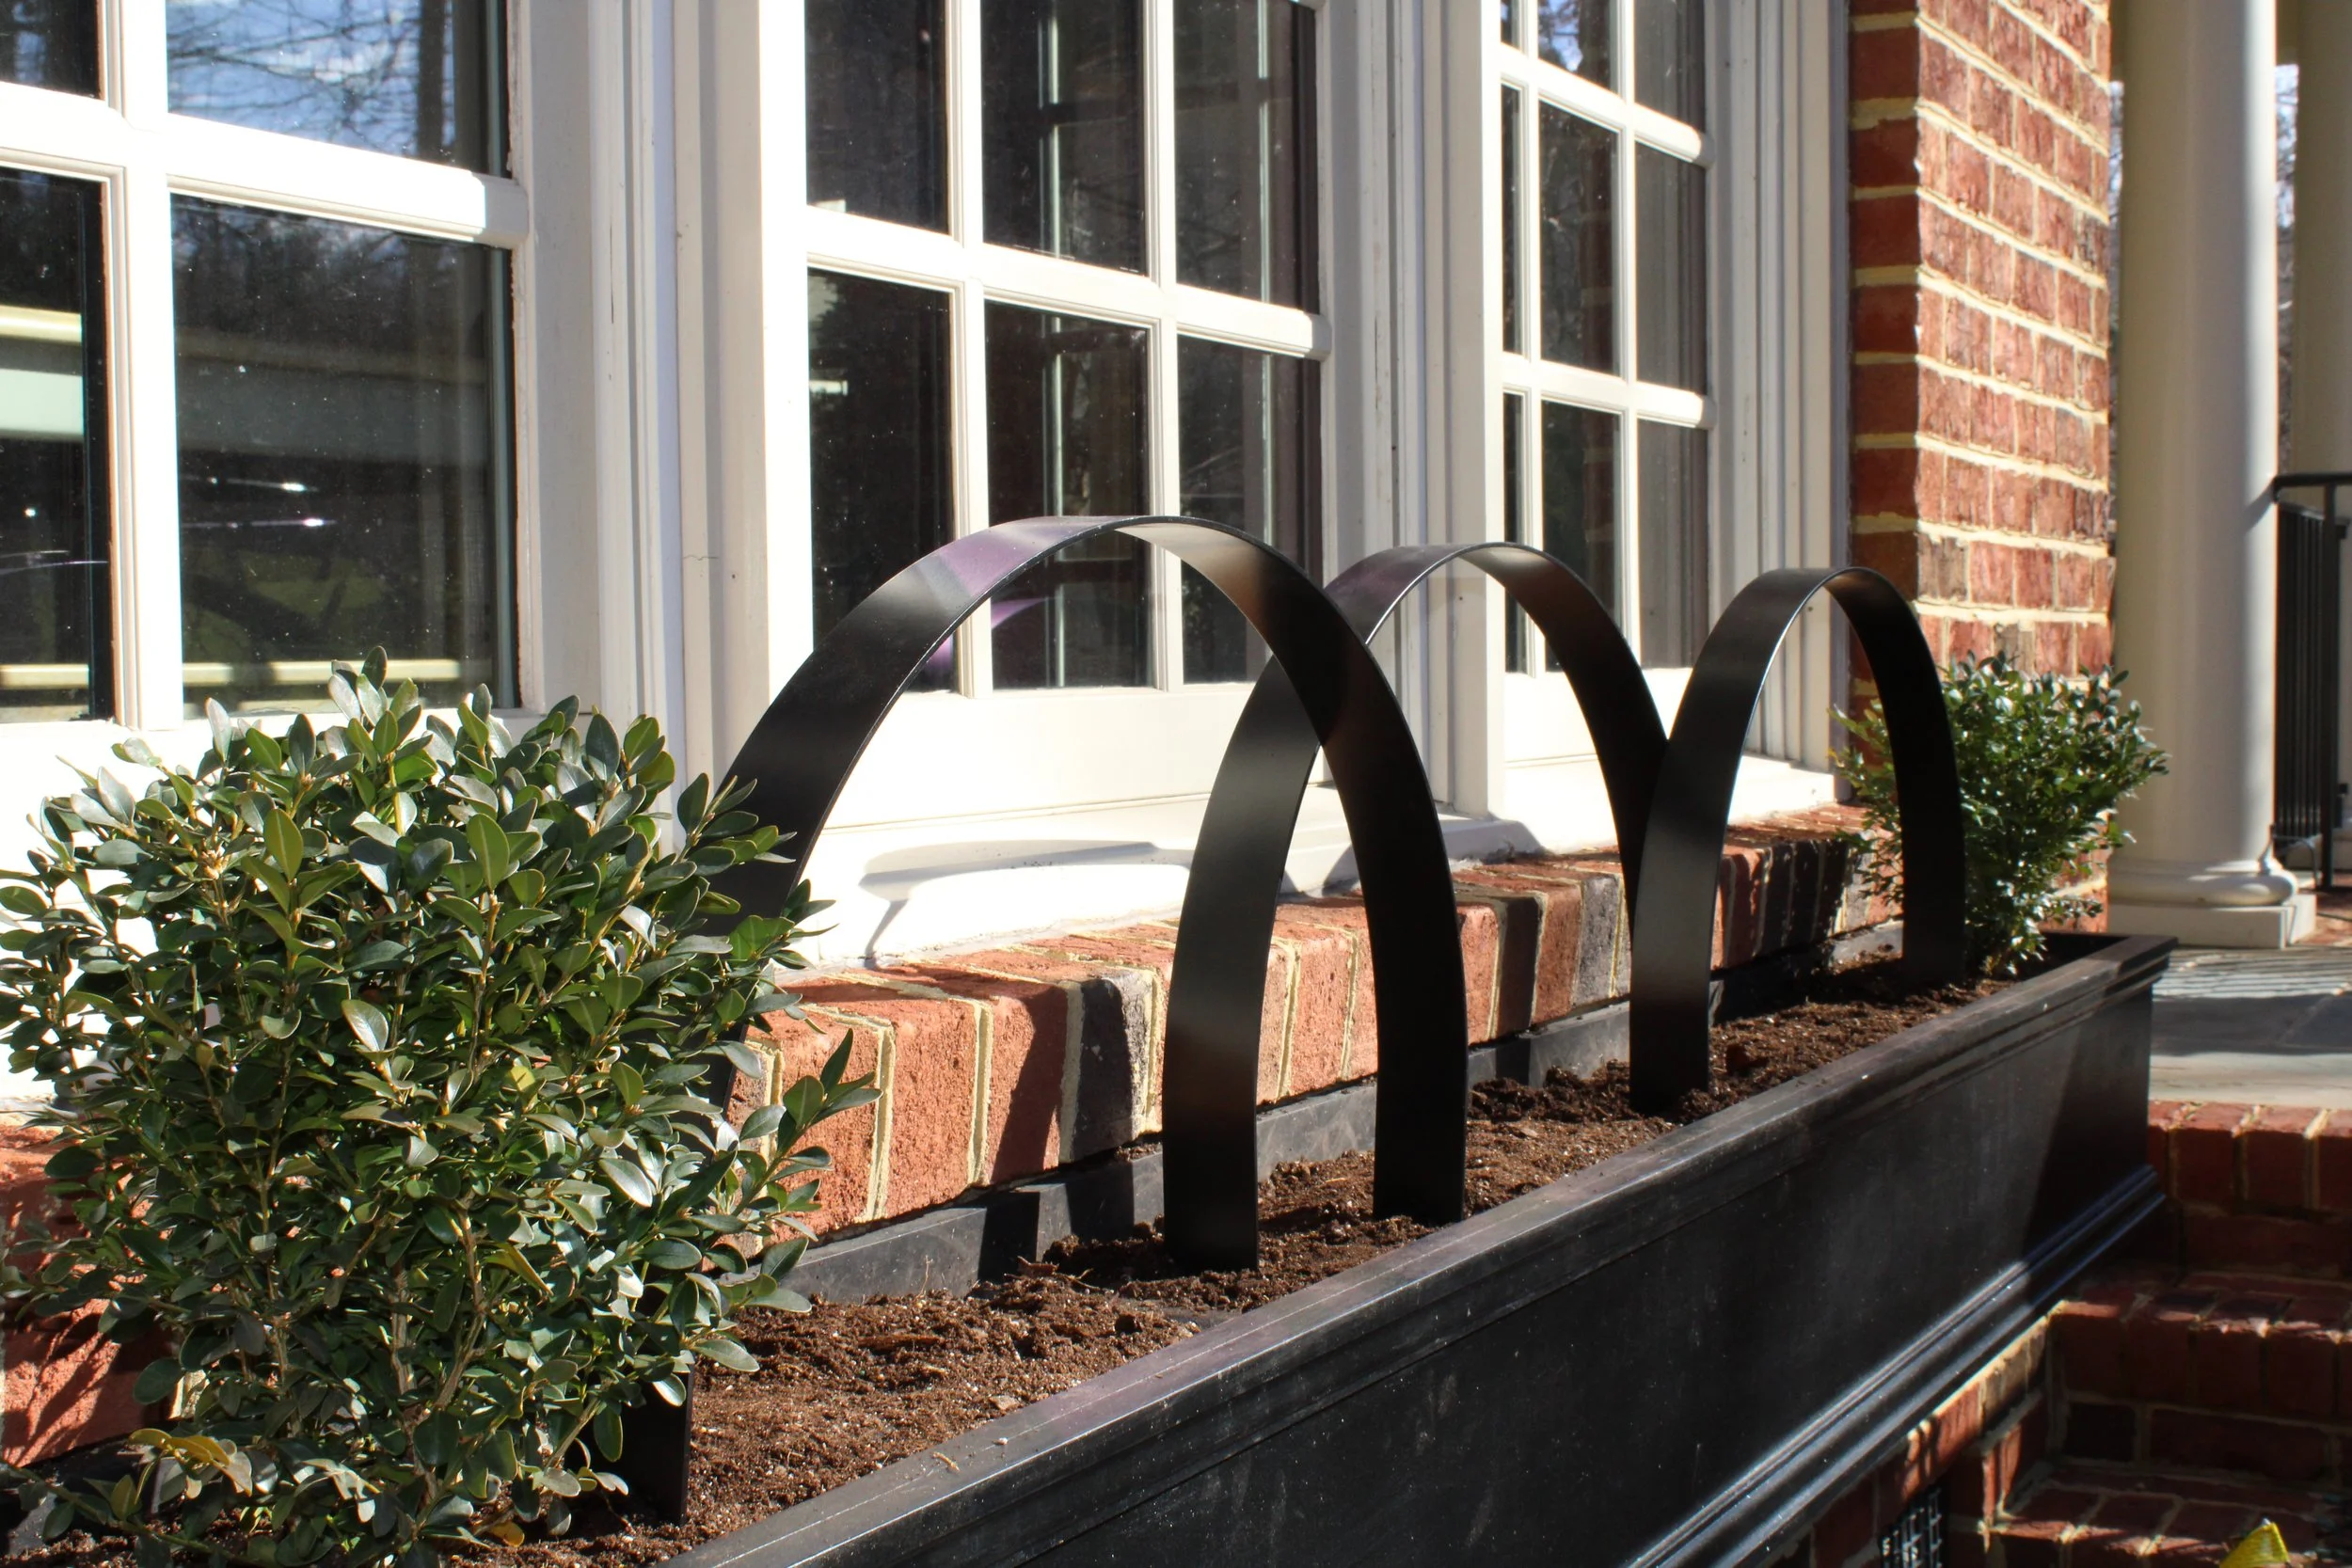
My window box is 96” long, comprised of three 32” sections. I removed the old roots from last season and backfilled with fresh potting mix, so I wouldn’t have any resistance when I inserted the arches and branches.
Planter Prep
No matter what season it is, I remove old roots from the prior season and add some fresh potting mix.
The arches arrived from Red Barn White House impeccably packaged and labeled. The only assembly required was securing the feet to the arch with screws and wing nuts (all included). I like it when things are user friendly!
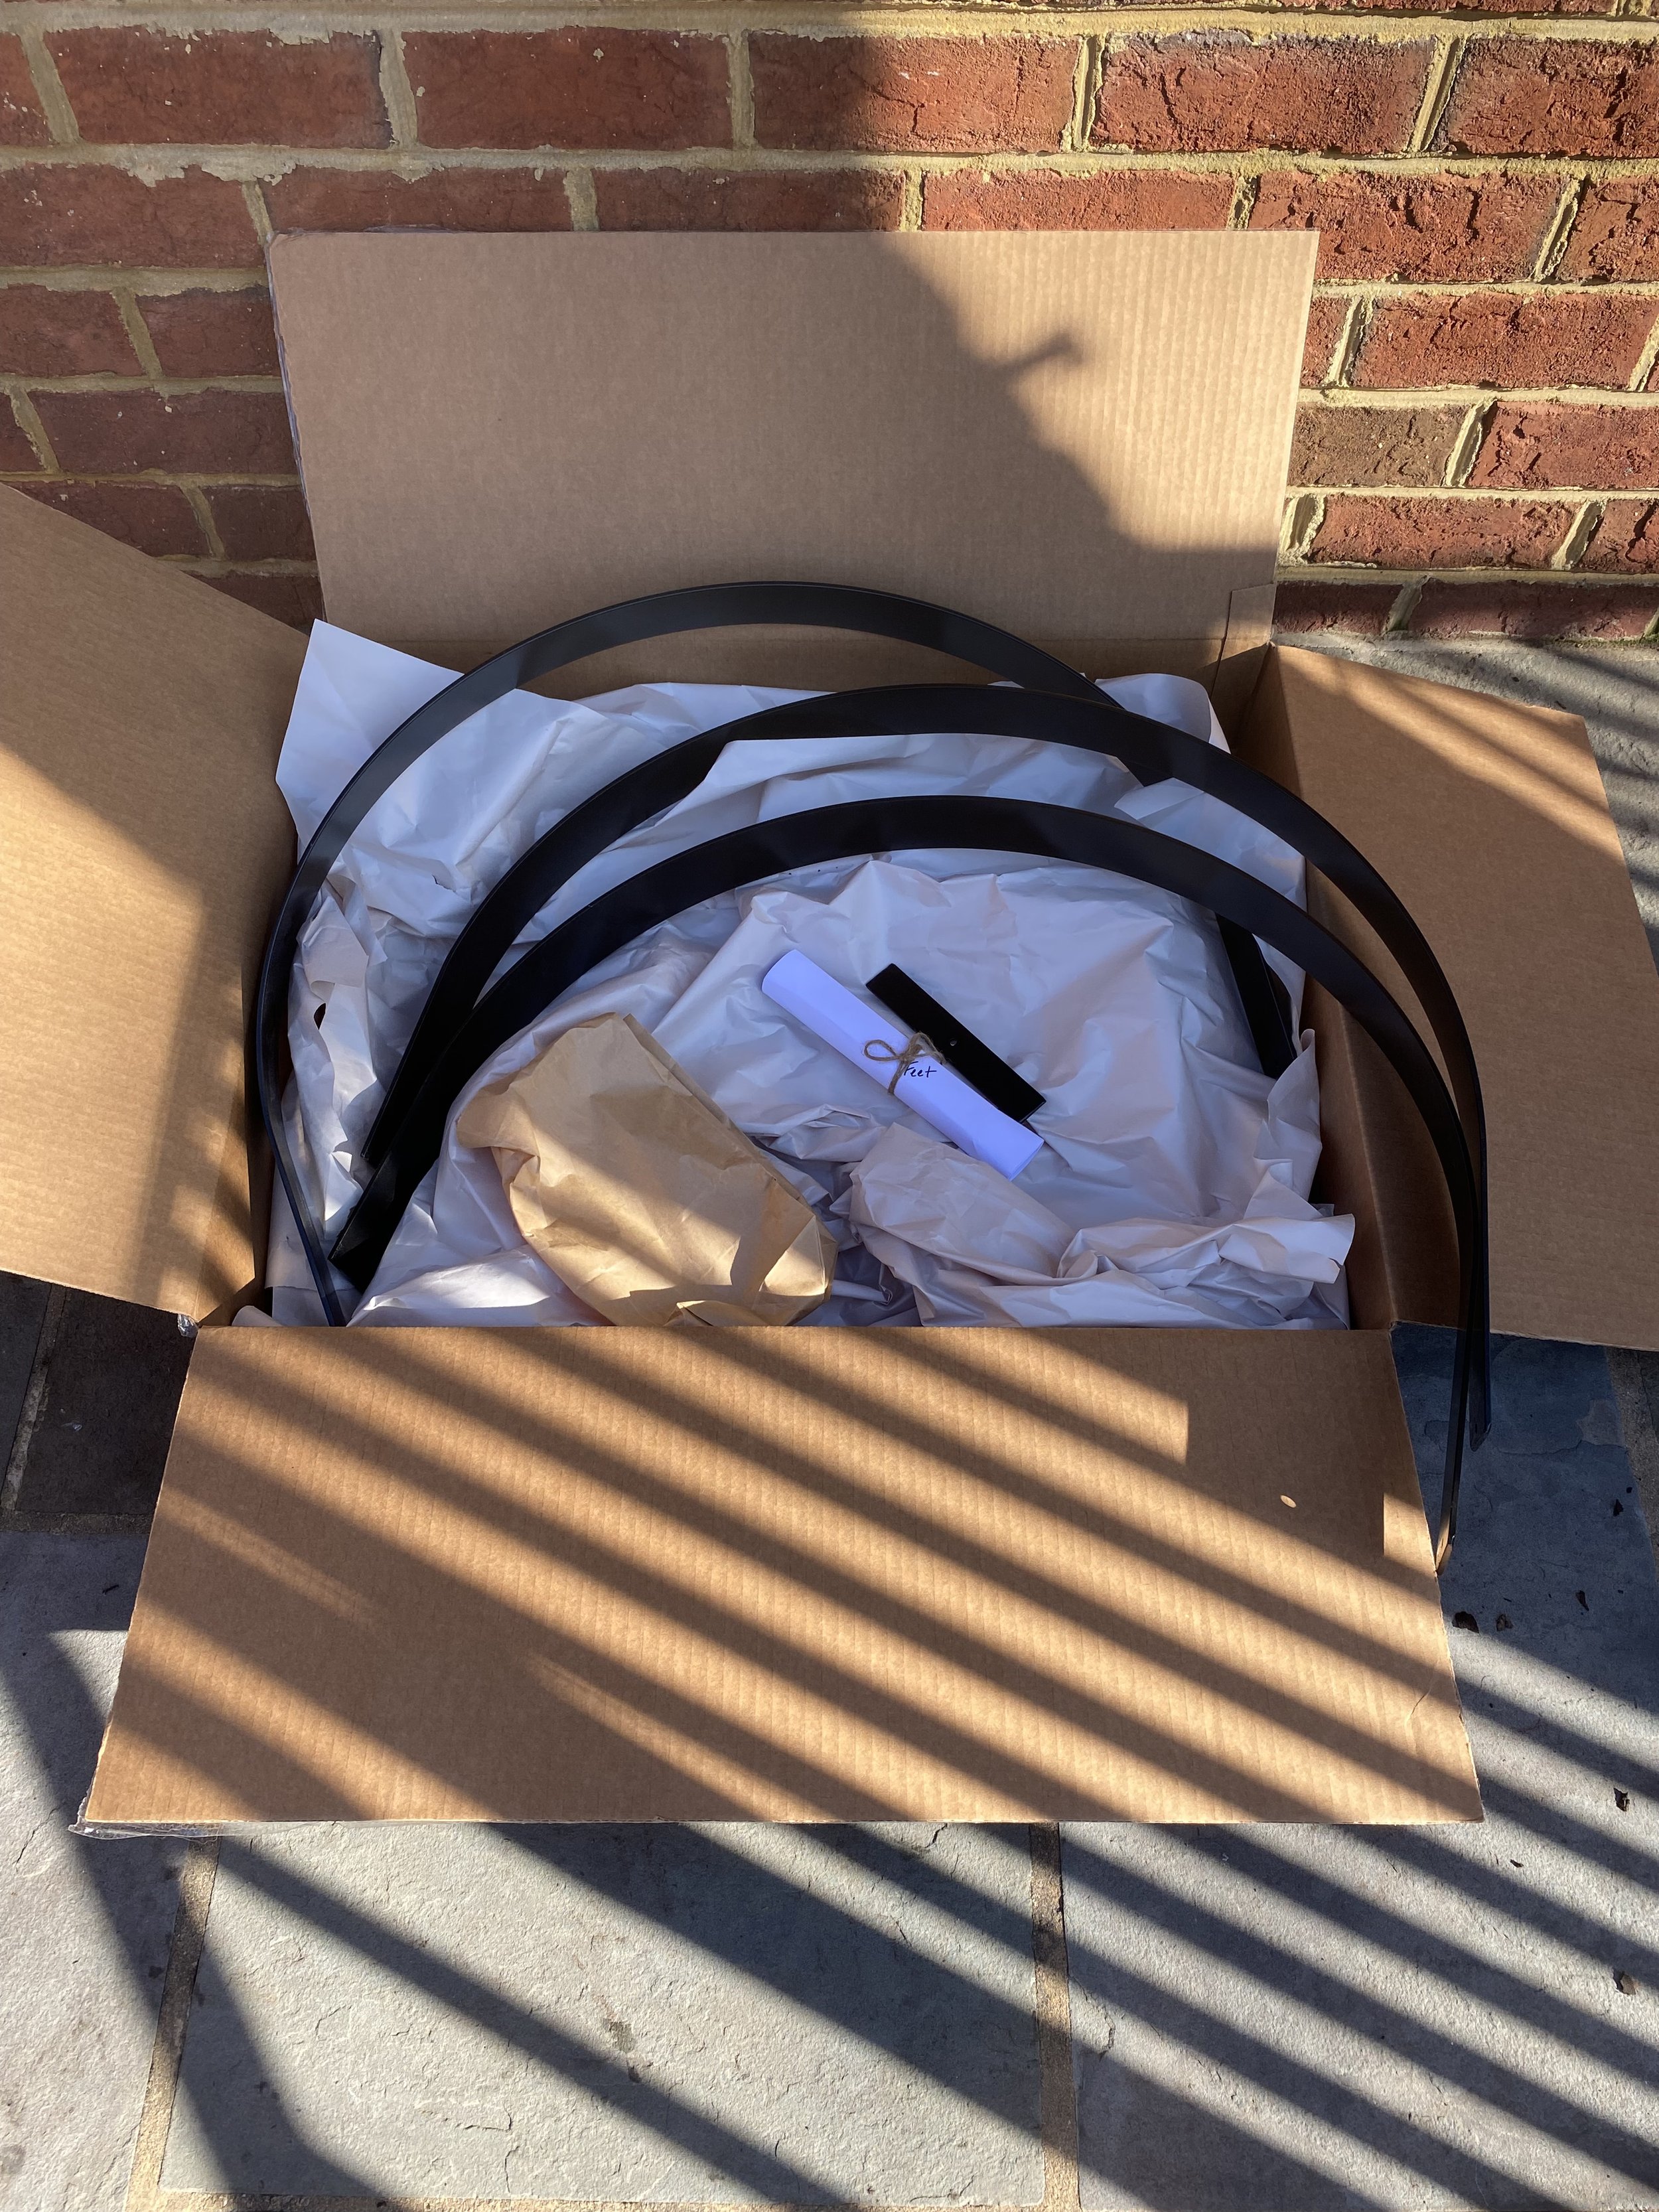

The arches are 25” wide. If I didn’t have those two little boxwood left from last season, I would’ve centered one arch in each section. Instead, I overlapped them to fit between the Boxwood. I tucked them in until they felt stable, about 5-6 inches below the soil line. Then I wrapped each arch with 100 indoor/outdoor twinkle lights and covered the plug openings and connections with electrical tape.


STEP 2: add evergreen boughs
I categorize my evergreen boughs into 3 functions — structure, filler, and spiller — and insert them in this order.
After deeply watering the potting mix and patting it down, I started with my structural greens, which are the longest, strongest branches I can acquire (here I used Frazier Fir, but Noble and Nordmann Fir are excellent alternatives). I used these to set the height and silhouette of the arrangement, and to support the other more flexible branches still to come. Please note that I use a LOT of branches in my arrangements!


Next, I added my filler evergreens to bring a different leaf shape, color, or texture to all of the needles of my structural greens. I chose Boxwood, variegated Oregonia, and Magnolia in this step because they’re readily available to me and I like the mix of leaf sizes. But any evergreen that introduces a new color or texture to the arrangement would be welcome.


I skipped the spiller in this arrangement because I felt like there was already a LOT going on. But a few boughs of incense or coned cedar can give any winter arrangement a nice weepy look and soften the edges of the container.
Next, I added more water to make sure the soil was nice and damp, then sprayed the entire arrangement with Wilt-Pruf, an anti-transpirant that helps prevent moisture loss. Here’s how it looked at this point in the process:

MIXED GREENS
Four types of greens were combined to create the perfect nest for these lighted arches.
step 3: add winter accents
In my opinion, this is the most fun part of winter containers! I used three types of pine cones: Sugar Pine, white-tipped, and whitewashed. I also added faux winterberry and tallowberry stems. (Note: I love real berries, but so do the birds and squirrels.) I laid out clusters of accents and inserted them throughout the arrangement. This helped create little focal points and a pattern of visual interest.


Here’s the final design at dusk. I love the subtle glow created by the lights on the arches and I’m thrilled by how well they show up from inside the kitchen, too! I shy away from adding lights to my winter container gardens because the weight of the wires tends to drag the branches down. You also end up seeing wires everywhere and the beautiful mix of greenery and accents can get lost. Adding lights to these arches gave me an easy way to illuminate my window box without stringing lights throughout the entire arrangement.
Red barn white house® garden ornaments
I can’t wait to create something new with these arches each season! If you’re looking for a way to elevate your own container garden designs, I hope you’ll visit Red Barn White House’s Etsy shop. They currently offer garden arches and orbs in a variety of shapes, sizes, and finishes…and there’s more to come later this year! Don’t forget you can use the code STEPHSAVES10 for a 10% discount off your purchase. Each piece is a work of art to add to your container gardens!